Table of Contents
A Sweet Holiday Memory in Every Bite
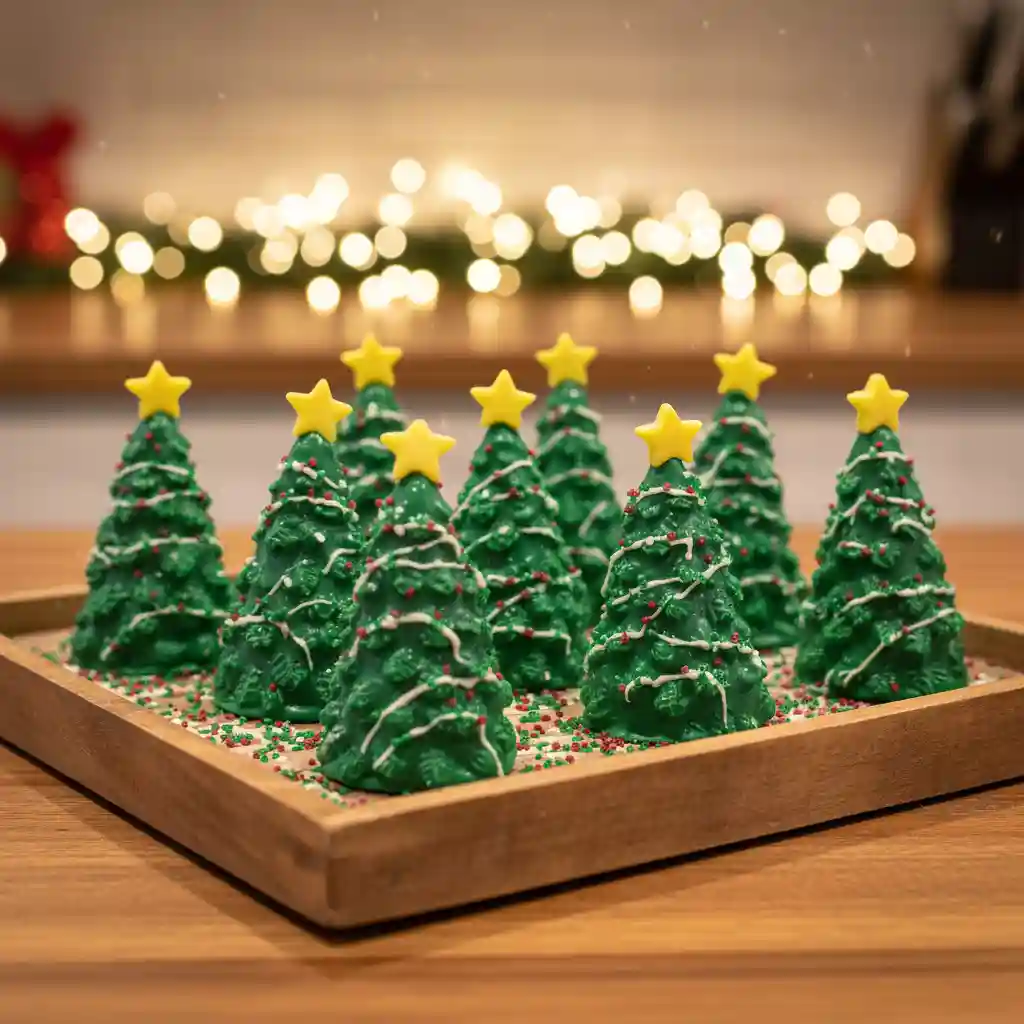
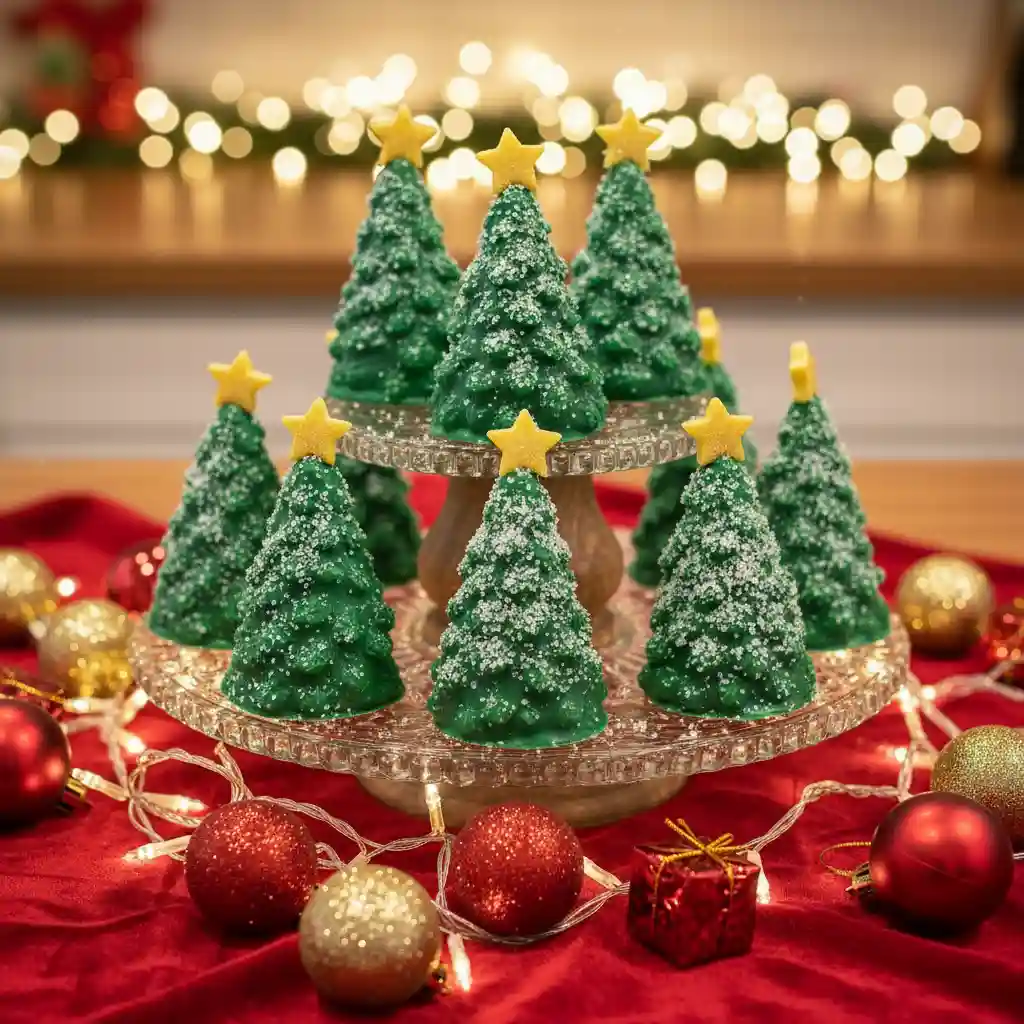
Every December in Asheville, the smell of sugar cookies and melted chocolate fills my kitchen. It’s my cue that the holidays have officially arrived and it’s time to make Christmas Tree Cake Pops. These bite-sized treats aren’t just desserts; they’re a tradition. My kids line up to help dip and decorate, and somehow, the sprinkles always end up everywhere but the pops.
When I was little, my grandmother would bake simple vanilla cakes and let me “trim” them with frosting. Now, I carry on that same spirit, but with a modern twist DIY Christmas Tree Cake Pops. They’re joyful, colorful, and easier than they look. Whether you’re planning a classroom party or just need a sweet moment with your family, these pops are pure Christmas magic in miniature form.
If you’re a fan of nostalgic desserts, you’ll also love my Santa Hat Chocolate Cake Pops another holiday favorite that always steals the show. Both recipes are crowd-pleasers that remind me why baking should feel like fun, not a chore.
Why These Christmas Tree Cake Pops Are Everyone’s Favorite
The best part? You can make them from scratch or take a delicious shortcut with Little Debbie Christmas Tree Cakes. Either way, you’ll get a soft, rich texture that’s perfect for dipping and decorating. This Easy Christmas Cake Pops Recipe works beautifully for beginners no special molds or fancy tools required.
When I serve these alongside a few Christmas Cookies Recipes at my holiday table, they disappear faster than anything else. And if you enjoy creative, festive dishes, try pairing them with my Mini Meatball Christmas Skewers for a full spread that delights both kids and adults. Because in my kitchen, holiday cooking is about joy, laughter, and a touch of edible sparkle.
How to Make Christmas Tree Cake Pops (Step-by-Step Guide)
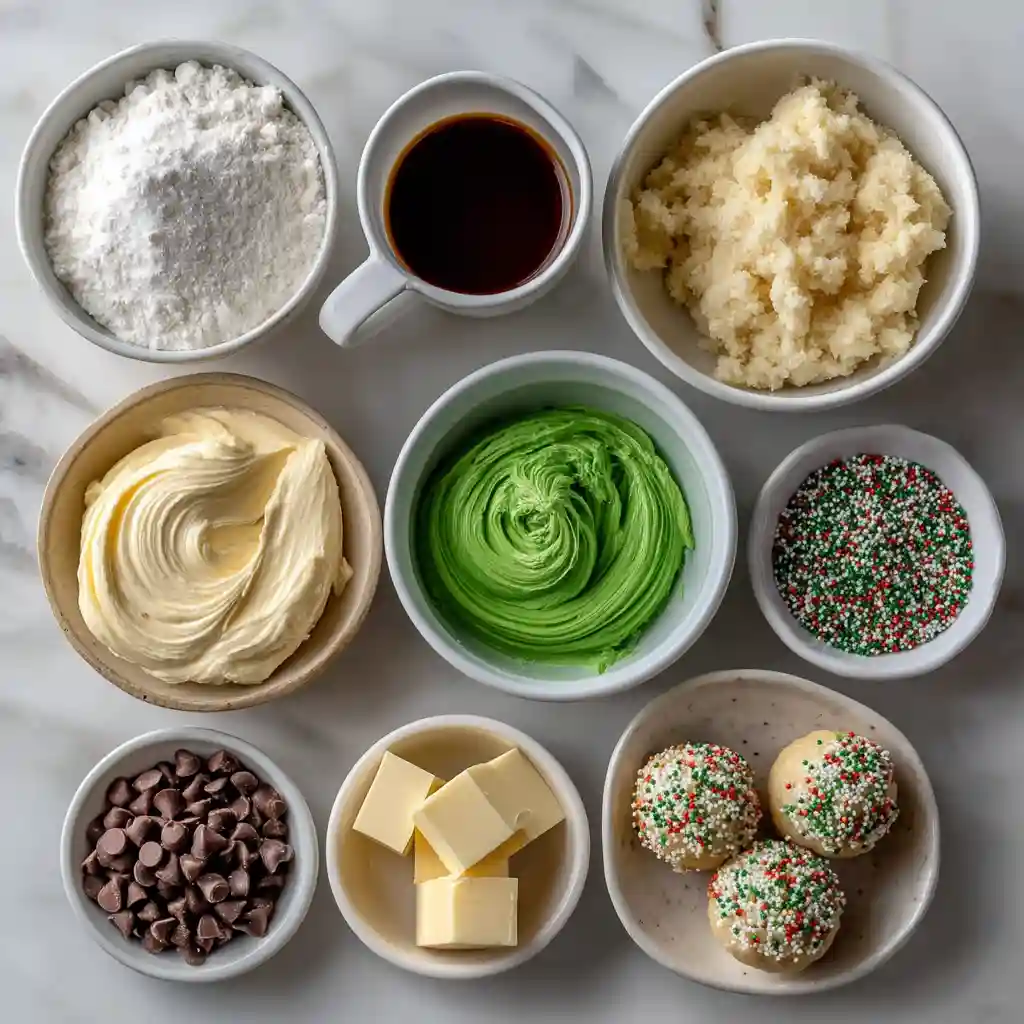
Ingredients You’ll Need for Festive Success
Making Christmas Tree Cake Pops starts with simple ingredients you probably already have in your pantry. If you prefer shortcuts, you can even use Little Debbie Christmas Tree Cakes they’re soft, sweet, and perfectly spiced for the holidays. But if you’d rather bake from scratch, this Easy Christmas Cake Pops Recipe keeps it classic while letting you add your own flair.
Here’s what you’ll need:
| Ingredient | Quantity |
|---|---|
| Vanilla or white cake (baked and cooled) | 1 9×13-inch cake |
| Vanilla frosting | 1/2 cup |
| White chocolate or candy melts | 12 oz |
| Green food coloring | A few drops |
| Sprinkles, candy stars, or edible glitter | As desired |
| Cake pop sticks | 12–15 sticks |
If you’re a cake lover, my Birthday Cake Recipe offers a fantastic base for these pops — just crumble it once cooled.
Step-by-Step Guide for Perfect Cake Pop Texture
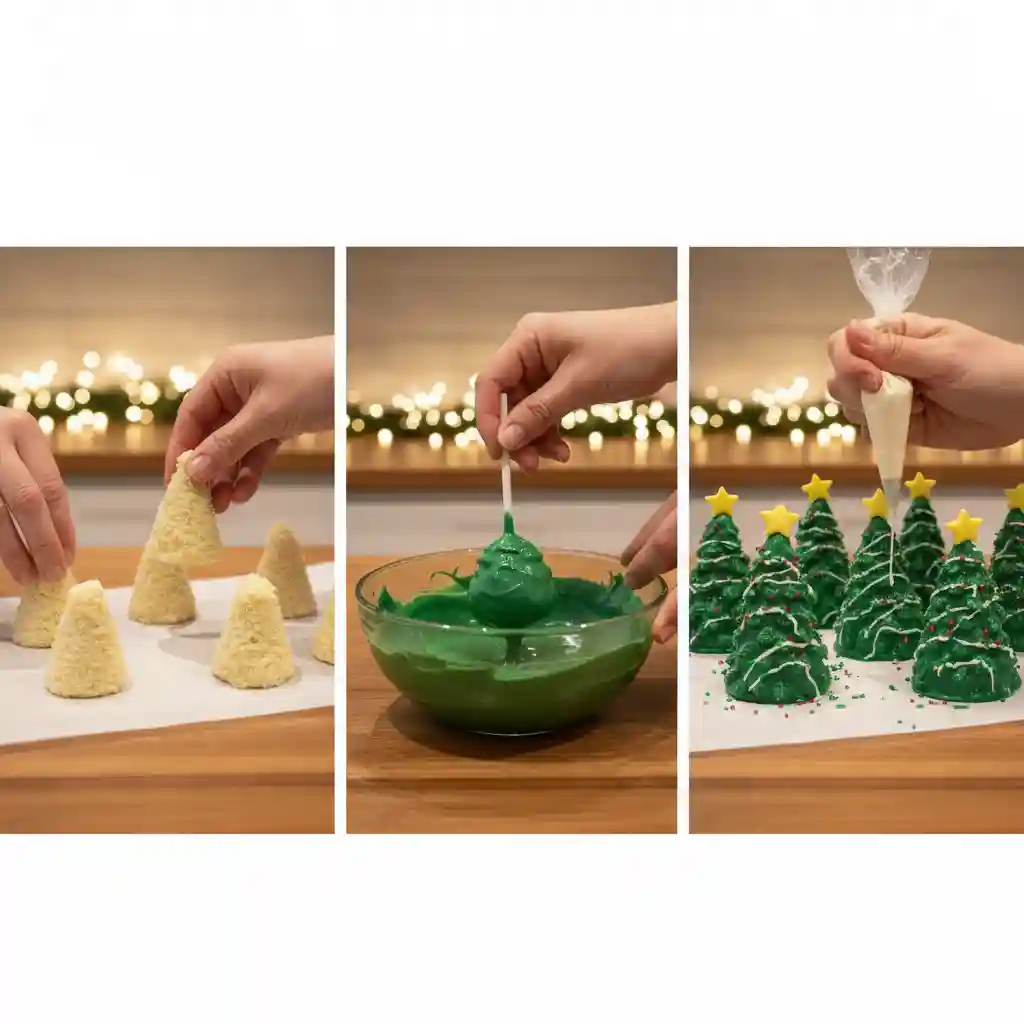
- Crumble the Cake: Once your cake has cooled, break it into fine crumbs using clean hands or a fork.
- Add Frosting: Mix in frosting one spoonful at a time until the mixture sticks together. You want it moist, not sticky.
- Shape the Trees: Roll small portions into cones, then pinch the tops to form a tree shape. This step is what makes DIY Christmas Tree Cake Pops so fun for kids.
- Chill Them: Place the shaped pops on a lined baking sheet and chill for 20–30 minutes to firm up.
- Melt the Chocolate: In a microwave-safe bowl, melt the chocolate or candy melts in 20-second intervals, stirring between each. Add green food coloring for that signature holiday hue.
- Dip & Decorate: Insert sticks, dip each pop fully, and sprinkle with decorations before the coating sets.
This recipe works beautifully even if you use Christmas Tree Cake Balls instead of pops they’re equally adorable and easier to gift. For more holiday inspiration, check out my Pumpkin Roll Recipe it’s another festive favorite that pairs perfectly with these sweet little trees.
Dipping, Decorating & Troubleshooting
Mastering the Dip – The Trick to Smooth Chocolate Coating
Perfectly dipped Christmas Tree Cake Pops look like they came straight from a bakery, but the secret lies in patience and temperature control. The chocolate should be warm and fluid never hot. Melt candy melts or white chocolate in 20-second intervals, stirring between each burst. If it feels thick, stir in a teaspoon of coconut oil to help the coating glide smoothly.
Before dipping, always chill your Christmas Tree Cake Pops for at least 30 minutes. This helps them stay firm and prevents the stick from sliding out. Once ready, dip each pop straight down into the melted coating, then lift it out in one clean motion. Avoid swirling or twisting that’s the most common cause of cracked or uneven coatings. Gently tap the stick against the bowl to remove any excess chocolate, and let gravity do the rest.
Set your Christmas Tree Cake Pops upright in a cake pop stand or styrofoam block while the coating hardens. If you’re working in a humid kitchen, let them dry in a cool area instead of the fridge to prevent condensation. For extra flair, drizzle melted white chocolate across each tree and finish with sprinkles, edible stars, or crushed peppermint. These small touches make every pop sparkle with holiday joy.
If you love creating stunning desserts, try pairing these with my Festive Spinach Artichoke dip it’s the perfect savory balance for your sweet spread and keeps your guests coming back for seconds.
Common Cake Pop Mistakes (and How to Avoid Them)
Even seasoned bakers run into trouble with Christmas Tree Cake Pops, but every problem has a quick fix. The biggest mistake? Using too much frosting. It makes the cake too soft and causes it to fall apart during dipping. The texture should feel like soft clay moist but sturdy.
Another common error is skipping the chilling step. Warm cake pops are fragile and tend to slide off their sticks once coated. Always chill them long enough to hold their shape. Also, keep your chocolate between 85°F and 90°F. Overheated chocolate cools unevenly, leaving dull, streaky pops. And don’t forget to stir! Even small bits of hardened chocolate can ruin that glossy finish.
The final tip? Never rush. Let your Christmas Tree Cake Pops set completely before wrapping or storing. When I make them alongside my Santa Hat Chocolate Cake Pops, I keep a rotation system one batch chills while another gets dipped. It saves time and guarantees that every pop looks flawless and festive.
Storing, Serving & Gifting Ideas
How to Store Christmas Tree Cake Pops for Maximum Freshness
Once your Christmas Tree Cake Pops are dipped, decorated, and dried, proper storage keeps them tasting as wonderful as they look. I like to line an airtight container with parchment paper and layer the pops in a single row. If stacking, add another sheet of parchment between layers to prevent sticking.
You can keep Christmas Tree Cake Pops at room temperature for up to three days if your kitchen isn’t too warm. For longer storage, refrigerate them for up to a week. Just make sure they’re sealed tightly to keep moisture out. When I plan ahead for a big holiday party, I even freeze a few they thaw beautifully overnight on the counter.
Avoid storing them in direct sunlight or near the oven; chocolate coatings melt faster than you’d think. If you’ve gone all out with colorful sprinkles or edible glitter, refrigerating too long can dull the shine. For a little holiday planning inspiration, check out my Carrot Cake Cinnamon Rolls another make-ahead favorite that stays soft and sweet for days.
When you take the first bite of a chilled pop, you’ll taste the balance of tender cake and smooth chocolate proof that even the simplest Christmas Tree Cake Pops can stay fresh and delicious with a little care.
Creative Ways to Wrap and Gift These Little Trees
Homemade desserts always make the best gifts, and Christmas Tree Cake Pops are no exception. Wrap each one in clear cellophane and tie it with a festive ribbon red and green for classic charm, or gold for a touch of sparkle. Place them in mason jars filled with mini marshmallows or line them up in decorative holiday boxes.
One of my favorite traditions is creating dessert baskets for neighbors, filled with these pops and a few other goodies like Banana Split Recipe – Easy Classic Dessert With a Twist. It’s a personal touch that spreads joy and feels more thoughtful than store-bought sweets.
If you’re hosting a party, arrange your Christmas Tree Cake Pops in a foam base shaped like an evergreen tree for an edible centerpiece that doubles as a conversation starter. Kids can even help decorate the display with candy ornaments. These sweet little trees never fail to spark smiles, and they remind everyone that food made with love always shines brightest during the holidays.
Whether you’re gifting them, serving them at your Christmas dinner, or saving a few for yourself, Christmas Tree Cake Pops are proof that simple, joyful recipes can make every holiday gathering feel extra special.
Frequently Asked Questions About Christmas Tree Cake Pops
Are cake pops just cake and frosting?
Yes, at their core, cake pops are simply cake and frosting combined into a dough-like mixture. The texture should be soft enough to shape but firm enough to hold on a stick. For Christmas Tree Cake Pops, you’ll crumble your baked cake, mix it with frosting, and shape it into tiny tree cones before chilling and dipping. You can use vanilla, chocolate, or even red velvet for a festive twist. If you love simple holiday desserts like these, you’ll enjoy my Christmas Cookies Recipes too they share that same cozy, homemade sweetness.
What is the trick to dipping cake pops?
The key to dipping Christmas Tree Cake Pops perfectly is temperature control. The chocolate coating should be warm, not hot about 85°F to 90°F. Always chill your pops before dipping, and dip straight down, then pull straight up in one smooth motion. Don’t twist or swirl; that causes cracks. Tap off the excess chocolate gently and let the pops dry upright in a foam stand for a flawless finish.
What not to do when making cake pops?
When preparing Christmas Tree Cake Pops, avoid adding too much frosting. Too much moisture will make the mixture greasy or cause it to fall apart. Don’t skip the chilling step, and never dip pops into chocolate that’s too hot it’ll melt the coating unevenly. Also, don’t store freshly dipped pops in the fridge immediately; condensation dulls the shine. Patience and proper cooling make the biggest difference in texture and appearance.
Why are the chocolate Christmas Tree cakes discontinued?
The original chocolate Christmas Tree Cakes by Little Debbie aren’t officially discontinued they’re just seasonal. They usually appear in stores from late October through December. So if you can’t find them, it’s likely they’ve sold out for the year. The good news? You can easily recreate the flavor and look with homemade Christmas Tree Cake Pops using chocolate cake, vanilla frosting, and candy melts. It’s a fun way to keep the tradition alive long after the season ends.
Conclusion
Making Christmas Tree Cake Pops is more than a holiday project it’s a joyful reminder that baking doesn’t have to be complicated to feel special. Every sprinkle, drizzle, and sweet bite carries the warmth of the season and a touch of homemade love. Whether you’re sharing them at a party, wrapping them as gifts, or enjoying one with a cup of cocoa, these little trees always bring smiles.
I’ve learned through the years that the best recipes aren’t perfect; they’re personal. Christmas Tree Cake Pops are the kind of treat that invites laughter, creativity, and the spirit of togetherness. So gather your ingredients, melt some chocolate, and start creating your own batch of Christmas Tree Cake Pops because nothing spreads holiday cheer quite like something made by hand and shared from the heart. And for more recipes follow me in facebook and pinterest.
Print
Christmas Tree Cake Pops A Festive, Fun Treat You Can Make at Home
- Total Time: P0DT0H30M
- Yield: 12 pops 1x
- Diet: Vegetarian
Description
- These festive Christmas Tree Cake Pops are fun, delicious, and perfect for gifting. Soft cake and creamy frosting come together under a smooth chocolate coating.
Ingredients
1 9×13-inch cake
1/2 cup vanilla frosting
12 oz white chocolate or candy melts
Green food coloring
Sprinkles and candy stars
Cake pop sticks
Instructions
1. Crumble the cooled cake.
2. Mix in frosting until combined.
3. Shape into tree cones.
4. Chill 30 minutes.
5. Melt chocolate and tint green.
6. Dip each pop and decorate.
7. Let set before serving.
Notes
You can use Little Debbie Christmas Tree Cakes for a shortcut. Chill pops well before dipping for best results.
- Prep Time: P0DT0H25M
- Cook Time: P0DT0H05M
- Category: Dessert
- Method: No-bake
- Cuisine: American
Nutrition
- Serving Size: 1 pop
- Calories: 180
- Sugar: 18g
- Sodium: 90mg
- Fat: 8g
- Saturated Fat: 5g
- Unsaturated Fat: 2g
- Trans Fat: 0g
- Carbohydrates: 24g
- Fiber: 1g
- Protein: 2g
- Cholesterol: 20mg

