Easy sourdough bread recipes for beginners simplify the complex process of natural fermentation into accessible steps for any home kitchen. This method relies on a bubbly starter, flour, water, and sea salt to produce a reliable artisan loaf without complex equipment. Master this technique once and enjoy consistent homemade results for every meal.
| Prep Time | Cook Time | Total Time | Servings | Difficulty | Cuisine |
|---|---|---|---|---|---|
| 20 mins | 45 mins | 24 hours | 1 loaf | Beginner | Artisan |
Why This Recipe Works
This bread recipe works because it focuses on a high-hydration dough that builds structure through simple folding rather than aggressive kneading. By using a long bulk fermentation period, the natural yeast develops complex flavors and airy textures without the need for commercial additives.
My experience proves that precise temperature control and minimal handling remain the keys to success for new bakers. This process prevents the dense, chewy textures often associated with failed loaves while teaching the fundamental feel of proper dough development.
Ingredients
| Ingredient | Quantity | Notes |
|---|---|---|
| Active Starter | 100g | Must be fed 4-6 hours prior |
| Warm Water | 350g | Use filtered water at 80F |
| Bread Flour | 500g | High protein content is essential |
| Sea Salt | 10g | Fine grain dissolves quickly |
Step-by-Step Instructions
Phase One: Mixing
- Combine the active starter and warm water in a large glass bowl.
- Whisk the mixture until the starter disperses into a cloudy liquid.
- Add the bread flour and sea salt to the liquid mixture.
- Mix the ingredients with a dough whisk until a shaggy mass forms.
Phase Two: Folding
- Perform a series of four folds every thirty minutes during the first two hours.
- Grab the edge of the dough, pull it upward, and fold it over the center.
- Rotate the bowl and repeat this action for all four sides.
- Repeat this process until the dough feels smooth and holds its shape.
Phase Three: Shaping and Baking
- Shape the rested dough into a tight round ball on a floured surface.
- Place the dough into a proofing basket for twelve hours in the refrigerator.
- Preheat your oven to 450F with a heavy dutch oven inside for one hour.
- Score the top of the dough with a sharp blade before placing it in the pot.
- Bake for thirty minutes covered, then fifteen minutes uncovered to brown the crust.
Chef Tips for Perfect Results
- Check the internal temperature of the bread with a probe thermometer to reach 205F.
- Use a digital scale because volumetric measurements lack the accuracy needed for sourdough success.
- Let the bread cool completely on a wire rack for two hours to prevent gummy interiors.
- Store your starter in a consistent, warm location to maintain peak fermentation activity levels.
- Use parchment paper for easy transfer of the dough into the scorching hot dutch oven.
Common Mistakes to Avoid
Using an inactive or sluggish starter causes flat loaves because the wild yeast lacks the power to lift the dough. Verify your starter doubles in size within six hours of feeding before beginning the mixing phase.
Adding too much flour during shaping creates dry, tough crusts that lack the desired artisan crunch. Maintain moisture on your hands instead of dusting large amounts of flour onto the work surface.
Variations and Substitutions
| Ingredient | Substitution | Impact on Flavor |
|---|---|---|
| Bread Flour | Whole Wheat Flour | Adds nutty profiles and fiber |
| Water | Filtered Milk | Creates a softer, richer crumb |
| Sea Salt | Kosher Salt | Requires slightly higher quantity |
Serving Suggestions and Pairings
Serve fresh sourdough toasted with cultured butter and organic honey for a classic breakfast. Pair thick slices with a bowl of roasted tomato soup during colder months or use them as a sturdy base for avocado toast with chili flakes. It also functions perfectly as the component for a high-quality grilled cheese sandwich using aged cheddar.
Storage and Reheating
| Method | Duration | Instructions |
|---|---|---|
| Countertop | 3 days | Store in a cloth bag |
| Freezing | 30 days | Slice, wrap, and seal tightly |
| Toaster | 2 minutes | Reheat slices to restore crispness |
Nutritional Information
Approximate values per serving (1/8 of loaf):
| Nutrient | Amount per Serving |
|---|---|
| Calories | 160 kcal |
| Protein | 6g |
| Fiber | 2g |
| Carbohydrates | 32g |
Frequently Asked Questions
Can I substitute all-purpose flour for bread flour?
You can substitute all-purpose flour, but expect a slightly less chewy crumb due to the lower protein content. For best results, choose a high-quality brand with at least 11 percent protein.
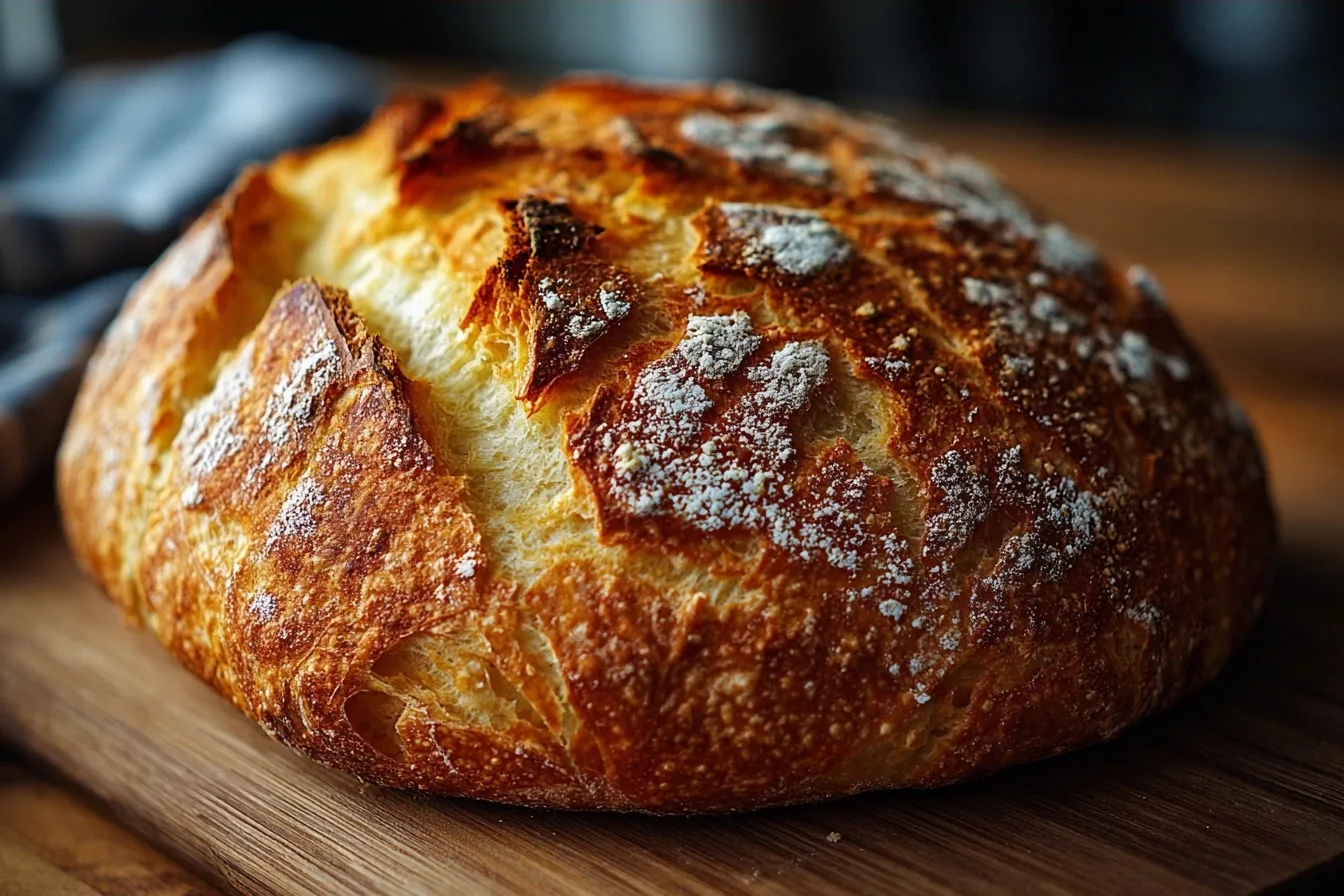
How do I know when my sourdough is finished baking?
The bread is finished when the crust turns dark golden brown and the loaf sounds hollow when tapped on the bottom. Using a thermometer to ensure an internal temperature of 205F provides the most reliable verification.
Why is my sourdough dough sticky and hard to handle?
The dough feels sticky because of its high-hydration ratio, which remains essential for an open crumb structure. Wet your hands or use a bench scraper rather than adding extra flour to manage the dough during folding.
Can I refrigerate the dough for longer than twelve hours?
You can refrigerate the dough for up to twenty-four hours to produce a deeper, more acidic tang. Monitor the dough closely, as excessive time in the cold causes the yeast to over-proof and collapse.
What should I do if my starter does not bubble?
The sluggish starter indicates a need for more consistent warm feedings or a move to a more active environment. Refresh the starter once every twelve hours for three days to build strength back into the yeast colony.
Mastering these easy sourdough bread recipes for beginners allows you to produce bakery-quality results from your own oven. Patience during the fermentation phase remains the most rewarded trait in this craft. Follow these guidelines to maintain a healthy rhythm in your baking routine. Your journey into sourdough will yield delicious, crusty loaves that define simple, rewarding cooking. Enjoy the unique aroma of fresh bread filling your home as you perfect your technique.
Print
Beginner-Friendly Artisan Sourdough Bread
- Total Time: 1440
- Yield: 1 loaf 1x
- Diet: Vegan
Description
Master the art of natural fermentation with this beginner-friendly sourdough loaf. By focusing on a high-hydration dough and gentle folding techniques, this recipe produces a beautiful artisan crust and an airy, flavorful inside. No complex equipment or commercial yeast is required; just a bubbly starter, flour, water, and sea salt to achieve a bakery-quality result in your own home kitchen.
Ingredients
100g active sourdough starter (fed 4–6 hours prior)
350g warm filtered water (80F)
500g bread flour (high protein content)
10g fine sea salt
Instructions
Combine the active starter and warm water in a large glass bowl and whisk until dispersed.
Add the bread flour and sea salt to the liquid mixture and stir with a dough whisk until a shaggy mass forms.
Perform a series of four folds every thirty minutes during the first two hours by pulling the dough edge upward and folding over the center.
Repeat this folding process until the dough feels smooth and holds its shape.
Shape the dough into a tight round ball on a floured surface once resting is complete.
Place into a proofing basket and refrigerate for twelve hours.
Preheat your oven to 450F with a heavy dutch oven inside for one hour.
Score the top of the dough with a sharp blade.
Bake for thirty minutes covered.
Remove the lid and bake for fifteen additional minutes to brown the crust.
Notes
Ensure your sourdough starter is very active for the best rise. Check the internal temperature of the bread with a thermometer; it should reach 190F-210F when fully cooked. Store in a bread box for up to three days.
- Prep Time: 20
- Cook Time: 45
- Category: Trending
- Method: Baking
- Cuisine: Artisan
Nutrition
- Serving Size: 1 slice
- Calories: 200
- Sugar: 0g
- Sodium: 250mg
- Fat: 1g
- Saturated Fat: 0g
- Carbohydrates: 40g
- Fiber: 2g
- Protein: 7g
- Cholesterol: 0mg